Inspire….

A picture is worth 1000 words. This safe has been through a lot. Tell its story. Image credit: “safe” – © 2007 Paul Keller – made available under Attribution 2.0 Generic


I clicked the ‘inspire me’ link on the ‘new post’ section. Today I feel a bit like this safe. A total rusted wreck left to deteriorate slowly over time. When it was newer it thrived and did all these things that nobody ever thought it would be able to do, it had hidden strengths and tricks that exceeded all it’s expectations. People were always so impressed.  However, it was sensible and always remembered that it was a safe and that was all it would ever be, not a cupboard or wardrobe or chest of draws, just a safe. But then it started getting tired more, it had some big issues that could have left it on the rubbish heap but some ‘safe experts’ were able to help it and it bounced back. Not completely back to normal but almost. Then it happened again and it had issues in other places of it’s tired metal body and the experts jumped in again and saved it from the rubbish dump but it would never be the same again after this. It got more tired and the rust spread more and more and it was unable to do it’s job properly. Nowadays it can only do the basics and everyday is a struggle. It just wants to go back to the simple days of just being a ‘safe’!

Yeah, I ran with it a bit there and got a bit dramatic. I apologise for my depressing tone but Ive been in such a lot of pain today and It’s knackered me out so much that I’ve been dozing in and out of sleep right up until about 6pm when I had my tea (Salmon Fish Pie and veg in case you were wondering) and then I managed to stay alert and awake enough to watch ‘Vera’ and work out the killer.

There’s a reason for me doing this post, I promise, it isn’t just a moan. It’s just away of explaining how I manage to do these things I blog about. Those that read these posts will probably just think about my subtitle ‘the girl with no fingers’. You may just think that’s all I have to overcome when I decide to create something, but it isn’t, in fact that’s the easiest part to deal with in a strange way. As well as the image of this safe there is another way to describe how I can feel everyday and how I have to deal with it. Quite a few years ago now, a lady called Christine Miserandino, wrote about, and invented, something called ‘Spoon Theory’. I personally think it’s a fantastic way to describe how people with a chronic illness or disability have to deal with their day to day lives.

You can read the blog post here and find out exactly how Christine came up with the idea, however I will just give a brief explanation too for the purpose of this post (I strongly urge you to read her post too even if you read my explanation as it’s a fantastic piece in it’s own right).

Now, Spoon Theory. (I should explain first that this theory is explained using actual spoons and in this circumstance, spoons  = some kind of energy) Most people, especially young people, have access to an unlimited amount of spoons but say you could only grab a handful of spoons, say you only had 10. Well that would be all you could use or ‘spend’ for the whole day. Like I said before, imagine that these spoons hold some sort of energy. As you only have 10 spoons to go about your day, you’re going to work out how to spend these spoons. So if you were me you’d have to spend 1 spoon to get out of bed, another for the toilet, another for my bath (that’s a non negotiable spoon, I have to spend that one every day) another 2 for my dressings (2 because this really drags it out of me). Then I always have a nap to try and recharge so say I manage to get 1 spoon back. So before I can even begin my day I’ve spent half my spoons. Now depending on the day I could have someone coming to see me which would use a spoon or two but if I was going to visit someone I would spend several because I’d have to think about getting in and out of the house, then the car to where I was meeting them, then the same coming back, then I’d have to think about dressings patch ups when I got home etc. The list goes on and while most people will just use 1 spoon for getting up, having a shower, getting dressed, having breakfast etc, I would need one spoon for every one of those tasks. I work on about 10-15 spoons a day (10 years ago I was working on 20-30+), sometimes less so when I actually manage to create something, I have often used several spoons before I even get to my crafting table. Sometimes I’ve ran out of spoons and just don’t have enough to create anything or to even to find any inspiration so all I do is nap, go down to the living room, sit and watch TV, go back up to my room and have more dressings done, then get in bed, spending more spoons that I may have grabbed back from resting on the coach. as I go.

I use spoons during crafting because it can hurt my legs if I have to sit in certain ways, say when I’m using the sewing machine, because I need to use my foot for powering the stitching. Sometimes my hands get sore from whatever I’m doing, especially when I’m doing beading or paper craft, anything like that can set them off.

Then again I can get a headache or my eyes get sore (that’s something else you can get with my condition but it’s not just ‘sore eyes’, that’s a whole other blog) so I need to have a break or quit it.

Anyway if you’ve made it to this part of my post then well done and thank you. I’m sorry I’ve gone on a bit but I wanted to explain why sometimes there a big gaps between crafting and posting and also just to give an insight into how I work. I’m not usually very open, I try to keep a level of anonymity on this blog but I thought this was something important.


Again, thank you for reading, there isn’t very many of you but thank you for the followers too.

Ams x


Wonderful Wool.

This is a post I started in November. I’m not that slow a writer but you know when you have to be motivated to do something? It has sat in my drafts but I just haven’t found my writing bug again until recently so after my recent post I thought I would dig this one out so I could update and post it.

Anyway, I have been receiving these fabulous craft boxes in the post for the last 6 or 7 months and they are one of the best things I’ve ever signed up for.

I discovered Crafty Creatives through a friend who mentioned her “craft box had arrived”. I was obviously intrigued and I checked them out. They are a small business placed in Glasgow and they provide a monthly subscription craft service. You pay £15 a month (plus £2.95 postage) and you receive a different themed box sent out around the middle of every month,. They’ve recently changed the way they compile their boxes, it used to be full of a couple of mini kits using a certain craft and it would guide you through your creation and it would also have some craft goodies such as bits of fabric, beads, embellishments, paint or anything appropriate that fitted that theme. Since January the boxes now have a large kit which is one particular craft for you to learn or revisit (if you’ve done it before) and you get all the info, guidance and all the tools and materials you need to make several creations of the particular craft. For £15 a month the value for money is fantastic. In the most previous boxes you got everything from a big bottle of PVA glue to art cards, art pens and pencils to jewellery pieces (a beautiful flower for a pendant, beads and charms), fat quarters of fabric to a sketch book. In the new boxes there have been Quilling, Marbling, Kumihimo and Silk painting kits.

Which brings me on to my blog post! CCBox15 had a needle felting kit. I remember seeing this craft on Kirstie Allsopp’s program but I just didn’t have the kit to try. Thankfully this box gave me all I need to give it a go.

It contained black and white wool, felting needle and instructions so I gave it a go one Sunday afternoon. I streamed Les Mis on my big TV in the living room, got the stuff out and I laughed, cried, sang and felted!

Image

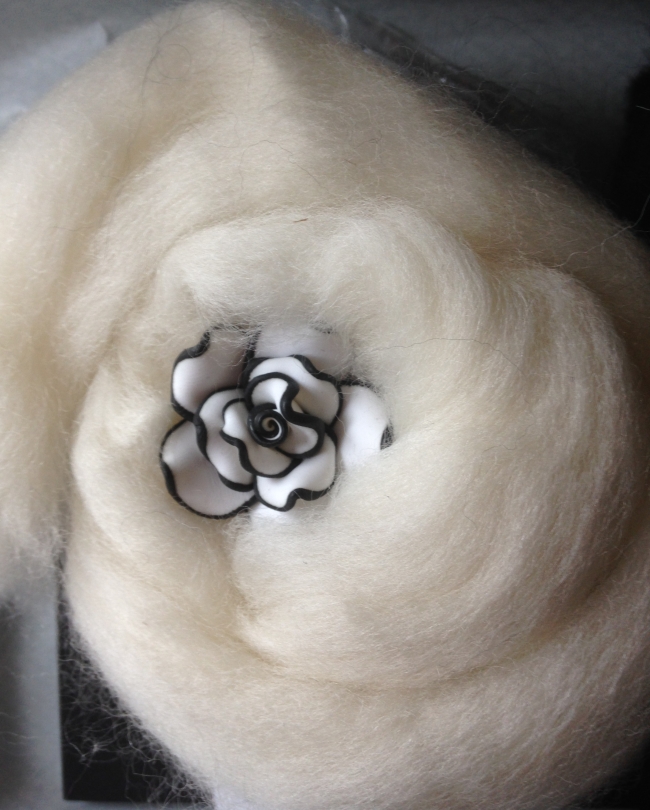
This is the white wool. The rose is just for decoration, it came in the box and I’m going to make a pendant for a very deserving friend as a present. As you can see it’s very fine and the black was just the same. There was quite a lot in the kit as you can see and I didn’t need all of it to make my sheep (the instructions were for a sheep so I didn’t want to try anything else for the first attempt, plus sheep are shadorable.

It’s not the quickest craft in the world but it’s quite therapeutic. It’s all about shaping the pieces of wool with constant stabbing of the needle. The needle itself has very tiny prongs along it which catches the fibres and pushes and pulls them, almost knotting the fibres together and firming up the wool into a more felt-like texture.  You need a larger ball of wool than you want the shape to end up as because it becomes smaller as the fibres mould together. It’s quite satisfying because it’s relatively easy to neaten up your shape and then to add other colours or to attach heads etc. In this case I made the body in white then made the legs, head and bobble tail separately and added them on. When you add them, because of the way you needle punch the edges first and then straight through the main part, it locks firmly so there’s no wibbly legs or bits falling off.

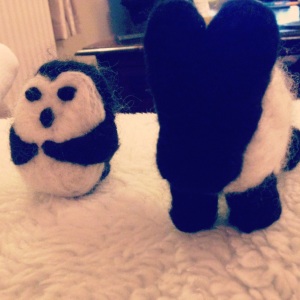
Once I’d finished the sheep I made a little penguin with the rest of the wool, I still have a lot of the white left though (which shows just how much you get in the kits).

Here are the Sheep and Penguin…

IMG_1212


Aren’t they the cutest?

I realise my sheep looks like it has a rabbits head but we’re all different, there’s nothing wrong with that!


Ams xx

Home Decor (or the reason I have kept my sanity over the last few months)

So as you can see, I haven’t posted much in a while and there is a very good reason for that. Unfortunately I haven’t been very well and my health has deteriorated rather rapidly over the last few months. I can’t work anymore which is driving me slowly crazy but I’ve decided to make a new start. I’m going to try and create and blog as much as I can between napping and having my dressings done ( a very long and painful process now, not that it wasn’t before, but not like this.) My mornings are basically a pain party and then I have a nap. However my motivation for doing something after that is very thin on the ground, mainly because I only have a couple of hours before I start getting ready for tea and spending time with my family and I usually spend those couple of hours watching old episodes of the Gilmore Girls.

I want that to change but before it does, I want to show you what I did manage to do in those few absent months.

I had an extension built onto my bedroom to help with my care. I’ve had a small kitchenette and a bathroom linked to my bedroom and I can’t begin to tell you how much it has helped (although my adapted bath which is meant to help me and cut down the very painful walks and movements I have to make, is still not installed after almost 13 weeks due to the appalling and uncaring staff in the Adult Social Care department up here in North Yorkshire, but that’s another story). I’ve also loved it because I have been able to decorate and furnish everything from scratch.

My first thought was the colour I was going to paint my rooms. I went for the same colour all the way through with one darker coloured wall in my bedroom so as not to make the smaller rooms look more enclosed as opposed to cosy. My Dad actually mixed the paint for me, these were the two colours I chose, both from the neutrals pallet.

Image       Image


‘Soft Stone’ and ‘Dusted Fondant’

These colours mixed beautifully and my feature wall was painted with just ‘Dusted Fondant’ so it just added that bit of bolder colour. Although usually I would have thought of something different for the bathroom tiles colour wise, I actually wanted it to flow through due to the layout of the rooms, so I went for a similar colour with large tiles in a ‘Soft Stone’ sort of colour but the mosaic border had purple, pink, blue and neutral small tiles scattered all the way through it.

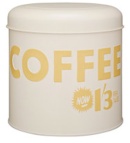
As for general decoration and furnishing, things came together by mistake really. I loved the duck egg and turquoise colours I’d seen around the home departments of stores or websites I’d been pouring over so the first burst of colour was a duck egg blue light shade and an old 1950’s advertising clock. In the kitchen I stuck with the retro theme, although purely by chance, I just chose what I loved the look of, right down to my tea and coffee containers.

cannies1cannies2


These were actually Vintage by Wayne Hemingway at John Lewis. I loved them, the colours and the style just fit in with how my kitchen was working out. Even my kettle had worked out well, a Russell Hobbs Heritage Kettle,  a spontaneous Tesco Direct buy with some club card points I’d managed to save and the fact that they had a cream one.

My actual kitchen cabinets seem nothing to write home about, simple off white doors with brushed metal handles, but they provide the perfect background to the kitchen appliances and accessories. The icing on the cake was a cute art print ‘Home’ in the style of Rob Ryan which was £7 with frame.

IMG_2022


As for the bathroom, well that is still a work in progress but I hope to post some photos when it’s finally finished.

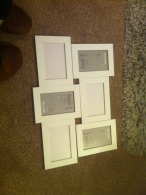
As for furniture in my bedroom, well there was very little I could actually do as I was keeping things the way they were. However I stripped my walls and started all over again with my decoration there. Photo’s are having much more of a significance in my life and therefore my decoration at the moment so I customised some plain white small photo frames from Ikea and with a bit of glue and washi-tape (you know how I  love my wash-tape!). Frames were £6 altogether and the washi-tape was from a pack of eight for £5 from Paperchase. To top it off I hooked up Bellatrix Lastranges’ wand that I bought from the Harry Potter Studio Tour.


IMG_0689IMG_2262


My wardrobe is a pet hate of mine. It’s built into the wall so short of ripping the whole thing out, re-plastering the wall and then buying another one, there’s not much I can do to it. But….. a-ha! Washi-tape to the rescue once again! I just decorated round the edges of the doors and they look great! I then revamped the handles and there was a pack of 6 pairs of handles for £2 in Ikea, you can’t really say no the that can you

IMG_2267


Sorry, not one of my best photographic works of art. Anyway I got a bit of a bug then and wash-taped my large wall unit that houses my cupboards and TV. I chose the same colour but a different shade, I didn’t want matchy-matchy.

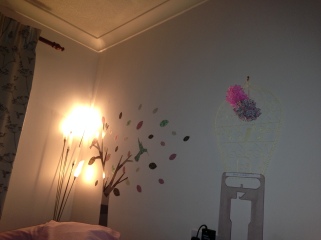
And finally…. to spruce up my wall behind my bed I chose the wall art decal’s again but I went for a more colourful decal as opposed to black. It was a huge sticker set for just £7.99 (eBay) but it meant I was able to stick to a colour scheme instead of using all the stickers and introducing more colours into the room I was able to stick to the palette I’d been going with.

IMG_2017       IMG_2019


After that it was just a matter of the added extras. I’d had a duck egg blue clock for a while but I changed it’s position as it fitted in much better being surrounded by my bits and pieces. Most of it was given to me by my sister. She picked up some beautiful prints and decorations on her travels and wandering around shops down in London where she lives. I’d been dying to put them all up and now I had the chance to.


IMG_2265


There are still bits and pieces I’ve added around the rooms which I haven’t photographed but they all add to the style of the three rooms. My next job is sorting out the lighting for my bathroom as I don’t like the large harsh light that’s already in there, but that’s a whole other blog post….


Ams xxx


More Silhouette Cameo Love!

Having mastered (well ‘mastered’ is probably pushing it a bit but anyway…) the arts of decopatch (mod podge) and silhouette cut outs I decided to make another gift for a friend along the same lines as my love banner but with one larger heart.

I used the same process, decorated my heart using the decopatch/mod podge method and then did a cut out using some textured card and putting it through my Silhouette Cameo.

Image

I used some paper in rich browns and golds so it was bold enough to show through because this time I didn’t have the same cut file to use.

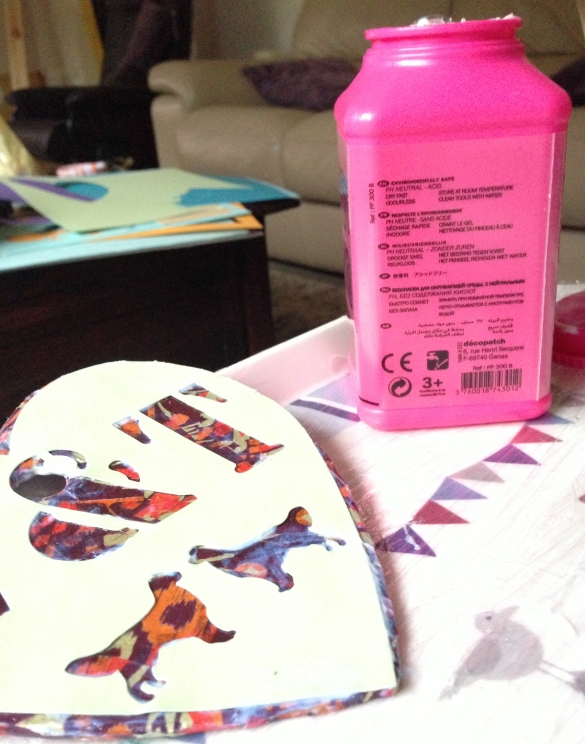
I’ve designed a couple of these in my Silhouette Studio but only cut out this one so far. I use a stencil font and the initials of the people I’m making the gift for. The letters are quite wide but to make sure there is enough of a cut out to show the decorated heart underneath, I also put a flourish below the letters. In this case though, instead of flourishes, I put the silhouettes of two of their Golden Retrievers.

Image

I’m not quite sure about how this one has turned out. I think it needs an outline around the letters and dogs so I’m going to try and go around them with my trusty sharpie, just lightly around the edge to give them a bit more definition.

This was just after it’s last coat of PVA which is why you can see white bits!

Image

I’ve got two more of these to do and I’m probably going to do the others with an outline. I might do the outline with my sketch pens in the Silhouette however to make it look a little neaher.

Anyway, still quite proud of how they’ve turned out!

Ams x

Silhouette Cameo Love… Bunting

I’ve done a few little projects with my Silhouette Cameo since it arrived last week but they have been rather small so far. The odd card, embellishment and little gift bag. However, I found this gorgeous free cut file from the thinkingcloset.com of a ‘Love in 10 languages’ banner. It’s a beautiful creation and Lauren from The Thinking Closet used burlap to mount the hearts which gave me an idea.

I’d just bought a decopatch (I think it’s called ‘mod podge’ in the US) heart garland base and some new papers with a knitting effect print so when they arrived I set to work and decopatched the small set of 5 hearts.

ImageImage

Then with cream cardstock I used my Cameo and resized the hearts slightly so they’d fit on the decopatch base and then set the Cameo to cut!

I then just used thin layers of the decopatch glue and pasted them onto the hearts. The card was quite dense so it kept it’s colour and shape even with the glue on but I was still more sparing than usual with it just in case.

Image

I used some normal packing string to hang them. They didn’t need any colour to distract from the hearts themselves. I was really pleased with how they came out. They look good close up but from a distance they’re really effective.

Image

They’re a housewarming gift for some friends so I hope they enjoy them.

These were surprisingly easy so I’ll hopefully be posting more successful Cameo projects soon!

Ams x


ReaderShowcase-FeatureButton-250

The wonders of Washi Tape!

I have been a big fan of washi tape for a good while now but I’ve never been very adventurous. I’ve just used it with my papercraft projects such as cards and a scrapbook I did for a friend.

However I was browsing Pinterest, as I so often do, and I found someone on there who had revamped some furniture using it. I have a table that I use as a bed-side table at night and in the living room during the day so it gets a lot of use out of it and it was very, very boring. So I decided to washi it!

It was really, really easy. I gave it a good wipe down and wiped it dry. Then just grabbed the washi tape and started applying.

I’d bought a multi-pack of 10 solid coloured washi tape from http://www.washitapes.co.uk and initially I was going to just use those in a pattern but after much discussion with my sister (as is essential with these things!), I got out the existing tapes I had which were all patterns and then put one stripe of pattern every three solid colours. It worked really well and makes it a bit more interesting without it being gaudy.

Just to finish it my Mum got some old B&Q varnish out the garage and gave it two coats, leaving it to dry in the garden.

I’m really proud of it! Here’s a photo of my sister and I’s handy work!

washitapetable

Ams xx

My apologies…

I have been a very bad blogger and I promised myself I wouldn’t do this with my blog but, alas, time has got away with me!

Anyway to make up for it I shall be posting a lot more as I have just purchased a Silhouette Cameo. This will throw me right into papercraft (well, all crafts really). I have done a lot of papercraft before but I think this will make my work a lot more detailed, versatile and professional.

Obviously I don’t want to be a ‘professional’, I want to keep my crafting fun, but I think this will mean that the ideas that bubble in my brain will actually share some resemblance to what will be the end product (hopefully)! Everyone who creates will probably know what I mean, we have this wonderful card/cake/dress/creation in our minds and we know exactly what it should look like and for the most part we know how we will create it. However, when we finish it doesn’t always look the way we had planned. I think, well hope, this Cameo will go a long way in making that creation look exactly how I want it to.

I’m also hoping it will advance my sewing machine skills as the cutting out will be done for me therefore getting rid of that annoying chore!

It should arrive tomorrow but in the meantime I have been watching videos and reading tutorials on how to use it so I don’t have to spend so much time studying the instructions and I can just get on and craft.

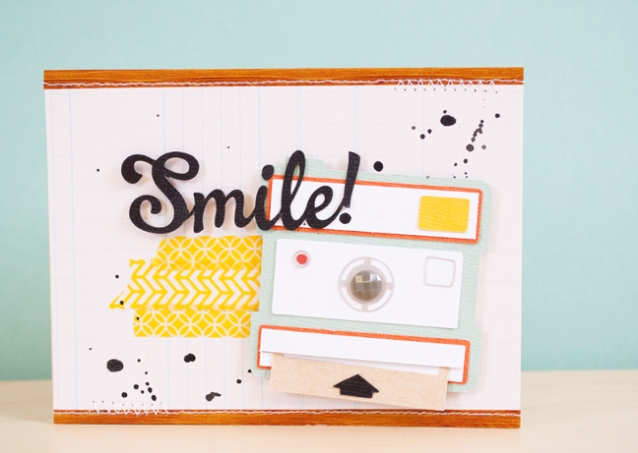
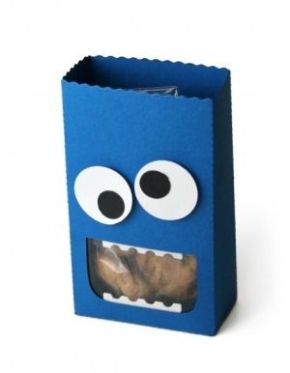
Below are some of the creations I’m wanting to try out and hopefully I’ll be posting about them very soon….

Image

Image

Image


Ams xx

Hello There!

I thought I’d do an introductory post (as I just found out how to!) just to say hello and explain a little about me!

This blog will house all my crafty creations.

What you should probably know about me is that I have a condition called EB. It’s a genetic skin condition and among many other problems it causes me, it has left my hands deformed (hence my sub-header ‘the girl with no fingers’!). I have no fingers on my left hand, it is just a fist, and on my right I just have a small thumb and no fingers. So I started this blog to record what I’d made. They’re not much to your regular Joe but they’re not the easiest things for me to create so I wanted to document them for myself.

If anybody actually reads this blog then thank you and enjoy!

Amy x

A card I made for a work friends’ birthday.

A card I made for a work friends' birthday.

Not my best work. I wanted to make it as simple as possible and by layering the balloon I don’t think I did. However I like the basic idea and the patterns I used.

It was just two bits of backing paper, some wire and a ribbon. The strip along the bottom is just a bit of Washi Tape (one of the best inventions in the world if you ask me!).

Thought I’d post it anyway as I haven’t done a card in a while, breaks up the knitting posts I suppose!!

Next knitting project – a Jelly Baby!

Ams xx

Zingy the EDF Energy guy!

So thanks to a bit of googling yesterday (when I was actually looking for a pattern for a Despicable Me Minion that wasn’t knitted in the round) I stumbled across a pattern for Zingy, the little guy from those EDF Energy adverts.

I love this little fella, he’s so cute so I whipped out my needles and knitted him pretty quickly. The pattern is really easy and thankfully, as I had been knitting my Red Nose Day noses, I had stuffing and eyes to hand!

So this is how the little fella turned out…

Image

And here is where you can get the pattern, thanks to this very talented lady!

Zingy Knitting Pattern

There’s two sizes and I made the smaller one. However both seem pretty easy!

Enjoy!

Ams xx